Tracker music without a tracker
We (almost) don't need to use trackers to create music on retro computers. There is an easier way.
As a musician, I have always envied demoscene artists the possibility of working with modern software. The graphic artist will prepare the image in Photoshop, than all he needs to do is to use the converter and copy the file to his retro-computer. That’s all - art for demoarty is ready. A musician’s life is not that easy. Musician has to work with trackers, whether he wants it or not. Personally, I have never liked trackers, I hated the description of the sound without flats, the idea of tables not reflecting the musical movement. That’s why a few years ago I wrote a python script that converts a music score to the Amiga MOD format.
In this tutorial, I will describe how to transfer a song from any note editor (I will use MuseScore) to the tracker. This is not a music composition tutorial, I assume the reader can compose music. I also assume basic ability to use the terminal. This tutorial is written for Linux and Atari ST version of ProTracker, however the workflow is easily replicable in any operating system, if GIT and Python 3 are available.
Step 1: Setup emulator and download ProTracker ST
sudo apt install hatari
Get TOS image from the internet (sorry, I will not provide link, but you will find it on Google).
Create empty folder on your computer – it will serve as virtual hard disk for emulator, and it will make exchenging files between PC and emulator easier.
Run Hatari UI and open configuration window by pressing F12. Press „ROM” button and browse for downloaded TOS image. Press „Hard disks” button and „Browse” in „GEMDOS drive” section – specify created folder as GEMDOS drive.
Download ProTracker from: http://www.atarimania.com/utility-atari-st-protracker-st_30690.html
Unzip ProTracker to GEMDOS drive folder. Reboot machine (option available in menu, activated by pressing F12 button). After reboot, you should be able to open hard disk from your Atari desktop and there you should find ProTracker. Run it by double-click .prg file.
Now you can start composing directly in ProTracker, but that’s not the goal.
Step 2: get score editor and score2tracker
Install MuseScore:sudo apt install musescore3
Install git:sudo apt install git
Clone score2tracker repository:git clone https://github.com/przem360/score2tracker.git
Step 3: Instal ProTracker2 Clone on your PC
This step is optional, I will use a modern version of ProTracker to add samples I have on my computer. If you prefer to work with samples on Atari, you can skip this step.
You can install ProTracker2 Clone by using apt:sudo apt install pt2-clone
However, in my case, version available in the repository turned out to be extremely unstable, so I decided to compile source code:
git clone https://github.com/8bitbubsy/pt2-clone.git
cd pt2-clone
chmod +x make-linux.sh
./make-linux.sh
Executable file can be found inside release directory.
Step 4: Write your piece!
We need to keep in mind that MOD format have some limitations.
MOD standard accepts only notes from range C0 – B3, some trackers can play up to B4, so notes C4 and higher will be omitted during conversion process and notes higher than B3 will not sound in ProTracker. Only 4 channels are allowed (channel is not exactly the same as instrument or track, but score2tracker maps parts and staffs to channels), maximum 128 patterns, each pattern can contain up to 64 commands (i.e. notes).
Also, score2tracker will not add samples, it will just translate and write note commands, so we will choose samples in ProTracker.
So let’s write our piece. Like you’d usually do in your score editor.
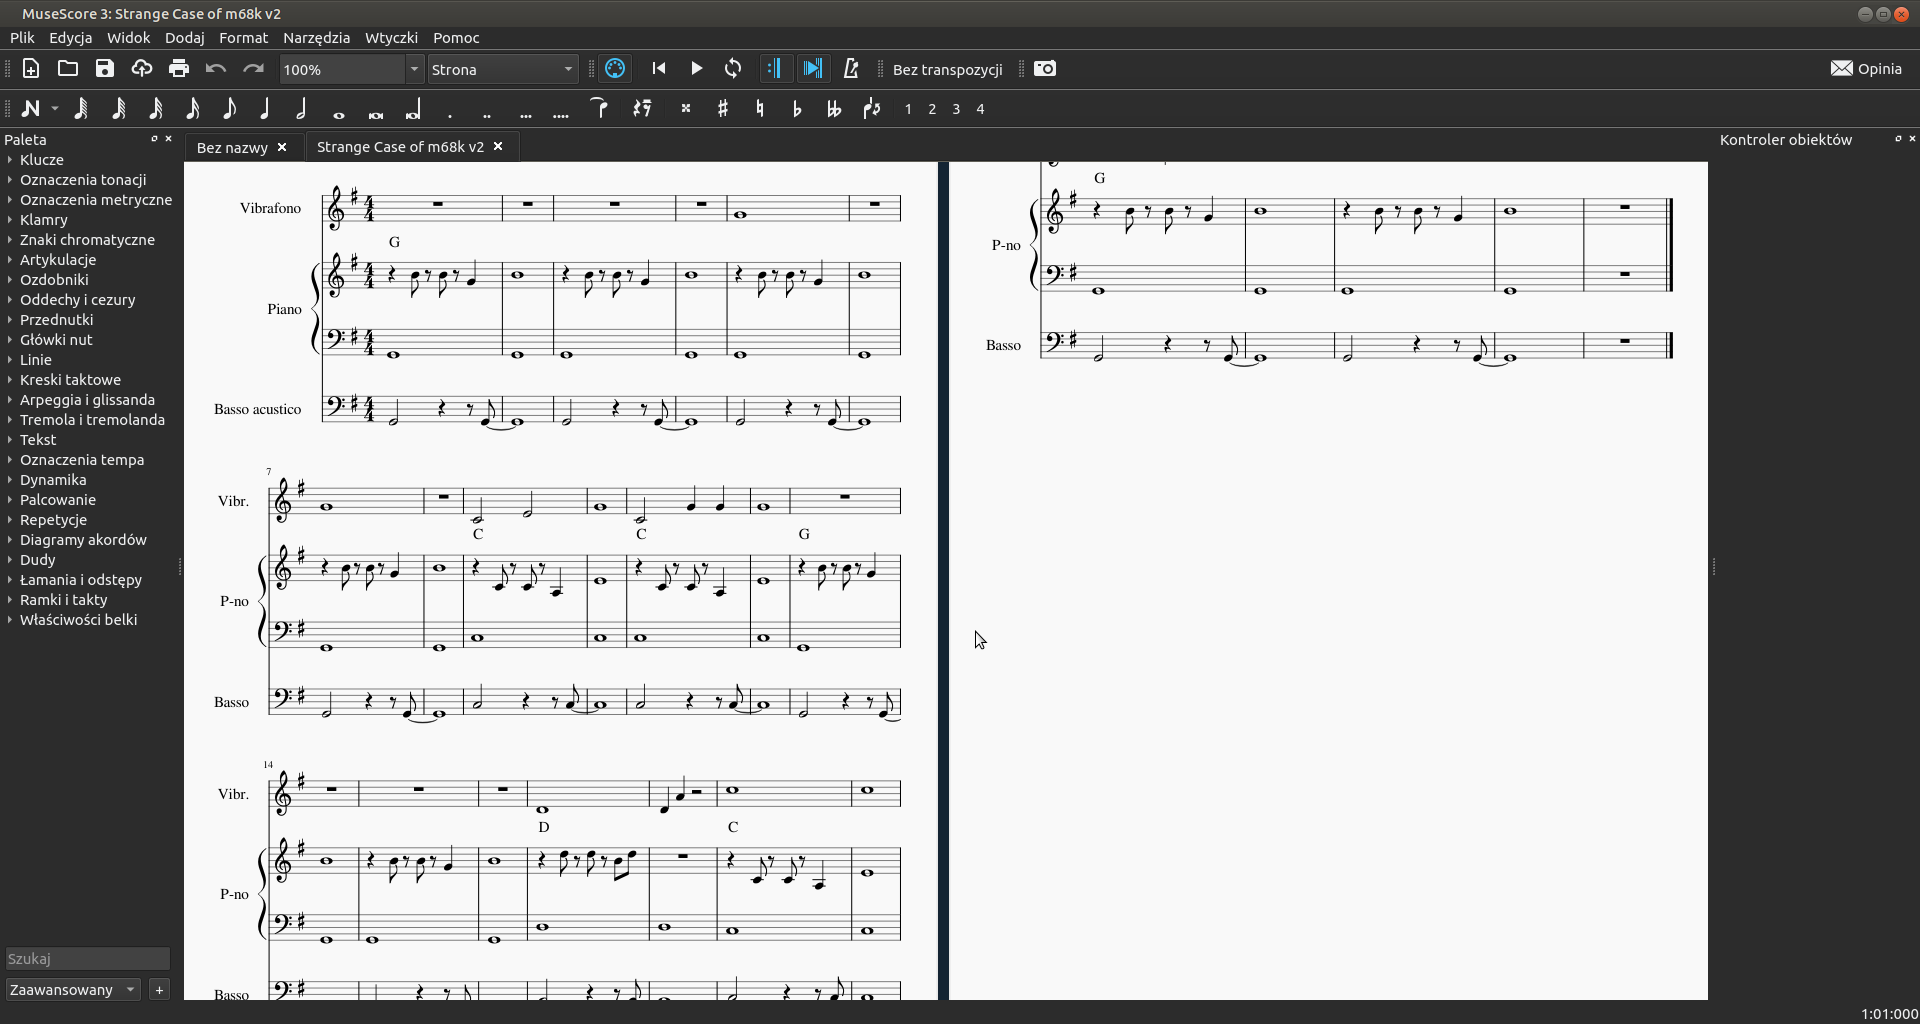
I decided to go with a simple lullaby melody which I wrote on vibraphone, piano and bass. However, my plan was to use only samples made with synthesizer. Because I was not very careful during writing this melody, later I had to transpose a whole song one octave down (to fit every note under B3). Transposing, in this case, does not matter for the sound, the samples will decide about the sound.
Step 5: Let’s get it to ProTracker!
The next step, after composition is done, is exporting the score to MusicXML format. In MuseScore choose File > Export… and set format as Uncompressed Music XML, file extension to .musicxml.
After .musicxml file is created, we can convert it to Amiga MOD format with score2tracker:
Go to directory where score2tracker.py sits and typepython3 score2tracker.py --i /path/to/file.musicxml --txt log.txt
script will ask you to select parts and staffs for each MOD channel. P1 is usually your first (top-most) instrument, P2 one below, and so on. If an instrument will be written on more than one staff, staffs will have numbers (i.e. Piano is written on two staffs, so if it is first instrument, it is described as P1, and also has staffs – treble is 1 and bass is 2), if instrument has only one staff, numbers like 1 or highest available should work.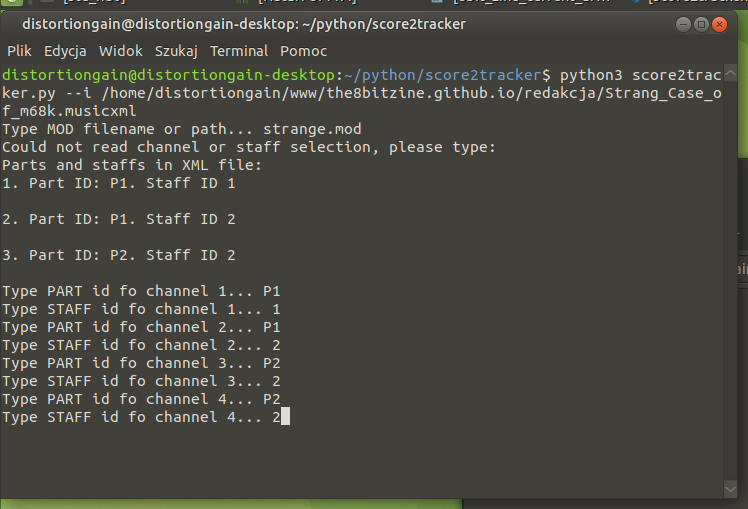
Open generated MOD in ProTracker Clone and add samples. Your notes should have assigned samples numbers: 1- for first track in first channel, 2 – for second and so on. All you need to do is to assign samples to numbers. First set sample number on left-hand side in main window, next click DISK OP. and LOAD SAMPLE. Repeat it for every sample number and that’s it – your MOD file should be ready!
You can use my free samples: the8bitzine_samples.zip
Now just copy MOD file to GEMDOS drive directory and load it into ProTracker ST.
Run ProTracker, click DISK and load module.
Potential problems
If you see weird marks, like ??? in ProTracker that means there are some notes that ProTracker can’t understand – there are notes higher than B3, just edit it and put lower note, or transpose your piece before converting in score2tracker.
Hope you found this article useful. In case of any troubles please use the comments section.