KETTU 512 XE - Raspberry Pi handheld computer for retrogaming
Yet another Raspberry Pi handheld computer. Because I desperately needed one. But something went wrong.
KETTU 512 XE is my homemade computer for retrogaming which I built with a Raspberry Pi Zero and ice cream sticks. The inspiration was the Polish computer kit CA-80 and the name refers to my favourite home computer Atari 65 XE. The word kettu means fox in Finnish language.
The Need
When I left my country, I left behind many things, including all my computers and laptops. After moving, I bought a Raspberry Pi 400, which serves as my daily computer until today. A long unsolved problem was the lack of a retrogaming computer.
Finally, when I was writing an article about the MIK CA-80, I found that if its designer could build a computer for himself in the 1980s, in a country plagued by eternal deficiencies, then I should be able to construct something for myself, I live in the 21st century, in a capitalist country.
About four years ago, when I was browsing The MagPi for the first time in my life (issue 55, March 2017), I was interested in an article showing the construction of the pocket retrogaming console, based on Raspberry Pi Zero and RetroPie OS.
The Idea
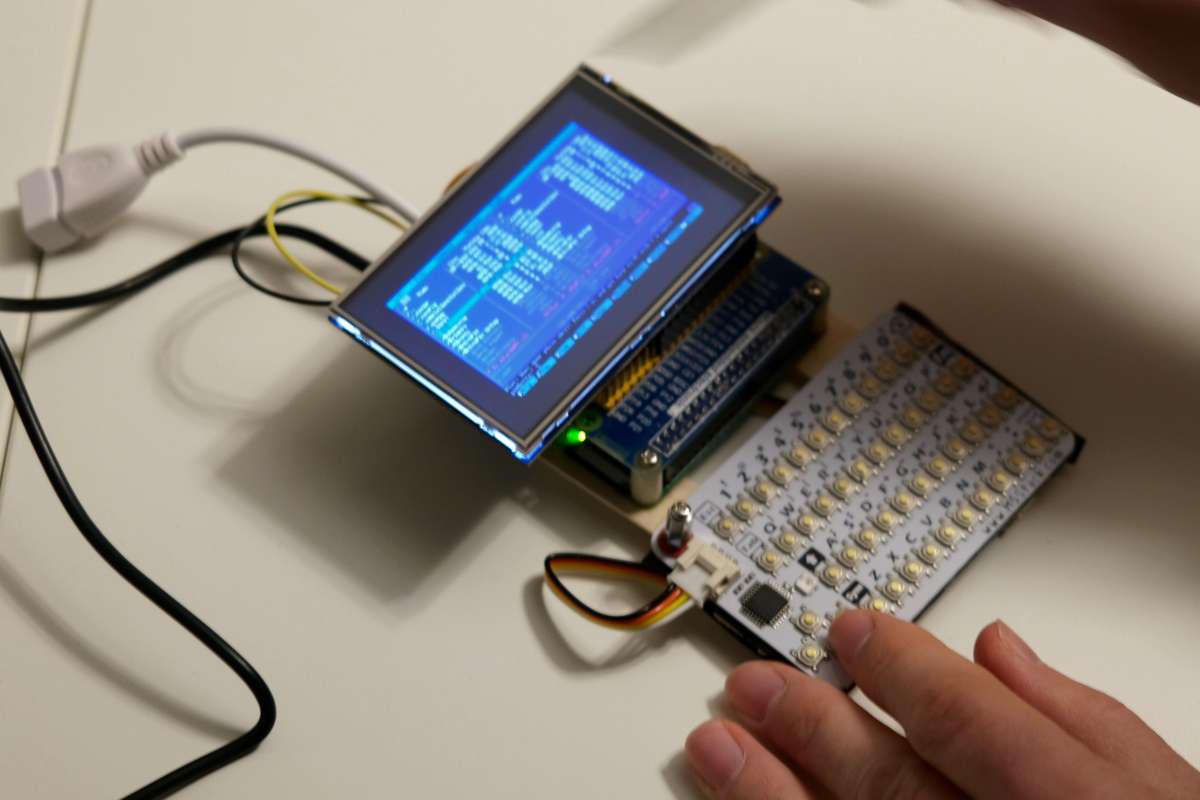
Recently I decided to finally build something similar. Only that my project was not supposed to be a console but a computer. The idea was simple - I wanted to equip the Raspberry Pi Zero with an LCD display and a small physical keyboard. Initially, I thought about getting a physical keyboard from some old smartphone, such as BlackBerry or Xperia X10 Mini, but it soon turned out that the simplest solution would be the CardKB - a card-sized keyboard dedicated to M5Stack devices. CardKB has a GROVE connector, so connection to the Raspberry Pi is possible thanks to GPIO and the I2C protocol. In addition, the GitHub user has prepared a script that handles CardKB for Raspberry Pi.
I chose the display without having any idea about it. Finally, I bought a WaveShare RPi LCD (A) - 3.5 inch touch display. This was where the problems began.
What were they thinking?!?
The Raspberry Pi has 40 GPIO pins, the WaveShare display takes 26 of them and only uses 12. The CardKB keyboard also needs access to 3V3 and GND. Both 3V3 pins and all GND are connected to the display. SDA and SCL pins, which the display does not use, are also blocked by it.
These are common problems, and WaveShare designers had good reason to cover unused pins. But I have to get to these GPIOs. The solution is the GPIO expander. The real trouble started when I installed the software provided by the manufacturer. On Raspberry Pi OS Lite, after switching to framebuffer, the display freezes every time, with the RetroPie Display often crashes when the Raspberry Pi switches between tty and framebuffer. Many users report similar issues on GitHub.
Unfortunately, WaveShare don’t care.
The Fix
In order for WaveShare displays to work properly on the Raspberry Pi, you should skip the installer described in the manual and manually copy the dtoverlays, then compile and install the framebuffer copy program yourself.
Copy display drivers:
git clone https://github.com/waveshare/LCD-show
sudo cp LCD-show/waveshare35a-overlay.dtb /boot/overlays/waveshare35a.dtbo
Add the overlays params to /boot/config.txt
dtparam=spi=on
dtoverlay=waveshare35a
Install Raspberry Pi Framebuffer Copy:
git clone https://github.com/tasanakorn/rpi-fbcp
cd rpi-fbcp/
mkdir build
cd build/
cmake ..
make
sudo install fbcp /usr/local/bin/fbcp
Install Framebuffer Copy in /etc/rc.local:
Add the line to the file, just before exit 0:
/usr/local/bin/fbcp &
After rebooting display works fine and without any issues.
The display now works simultaneously with the HDMI signal, which was impossible when the WaveShare script was used.
CardKB and Raspberry Pi
Unlike WaveShare, ian-antking, who shared a script on GitHub to enable CardKB, to be used on a Raspberry Pi, did a great job.
The only problem is with CardKB itself - there is no Ctrl key, so no way to interrupt the process by pressingCtrl-C.
Fortunately, Linux allows you to assign actions to different keys. In the .bashrc file, I added the line:
stty intr ^ [
This ensures that the interrupt command is assigned to the Esc button when the terminal is started.
Small screen, small font
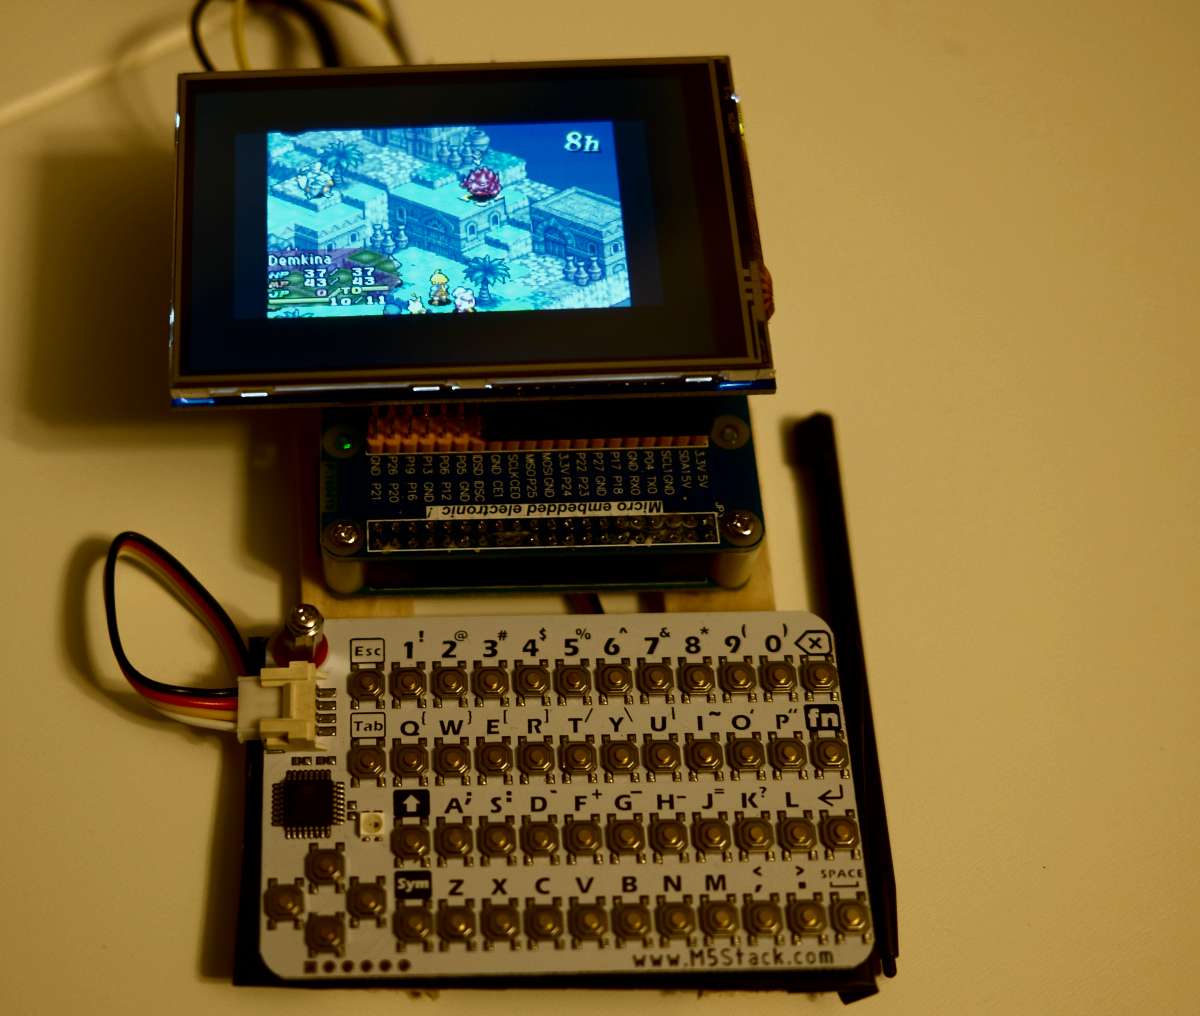
At this point, my mini-retro-computer works and does everything I wanted it to do. I can use Linux, I can play retro games and do stuff typical for retro nerd. Gaming is fine, but writing is very uncomfortable - this screen is just so small. The solution to this problem is the setfont command, which allows you to change the font in the terminal.
I added the line to the .bashrc file:
alias fontzoomin='setfont /usr/share/consolefonts/Lat15-Terminus32x16.psf.gz'
thus there is an alias fontzoomin in the system which changes the font to a slightly larger than the default one. Using setfont affects also programs working in tty, like Midnight Commander or VIM.
Downsides
The project turned out to be more expensive than similar things available on the market, like Pocket C.H.I.P.
Lack of cover makes it rather fragile.
CardKB does not work with emulators. It works only in terminal and in EmulationSation, but I can not use it as game controller (but I wanted to use external controller anyway).
Typing longer text with CardKB is terrible.
It was supposed to be a pocket computer, now I need a damn big pockets.
But it works. I can take it anywhere, and I absolutely love it!
Iterations and plans for future
I plan to develop a revised version. I will replace the Raspberry Pi Zero with a newer version - Zero 2, with a 64-bit processor. The WaveShare display was a terrible choice, I will change it to PiTFT from Adafruit. I will add a power charger and battery to make the computer portable. I plan to build a custom game controller based on the STM32 or the Raspberry Pi Pico.